Softprobe Documentation
Zero code changes • Full-context visibility • Cost optimization
Softprobe fixes observability’s “missing context” by capturing every user journey as a session graph—making interactions analyzable, automation-ready, and economical to retain.
Problem
Traditional logs and observability tools center on costly indexing. Teams compensate by sampling heavily, which discards context and slows troubleshooting and support.
Solution
- Session Graph: Group events by user session to form one coherent, end-to-end record
- Cost Restructuring: Replace expensive indexing with session context so 100% of data can be retained and queried more efficiently
- AI-Ready: Rich session context powers automated root-cause analysis, issue prediction, and smarter support
How it works
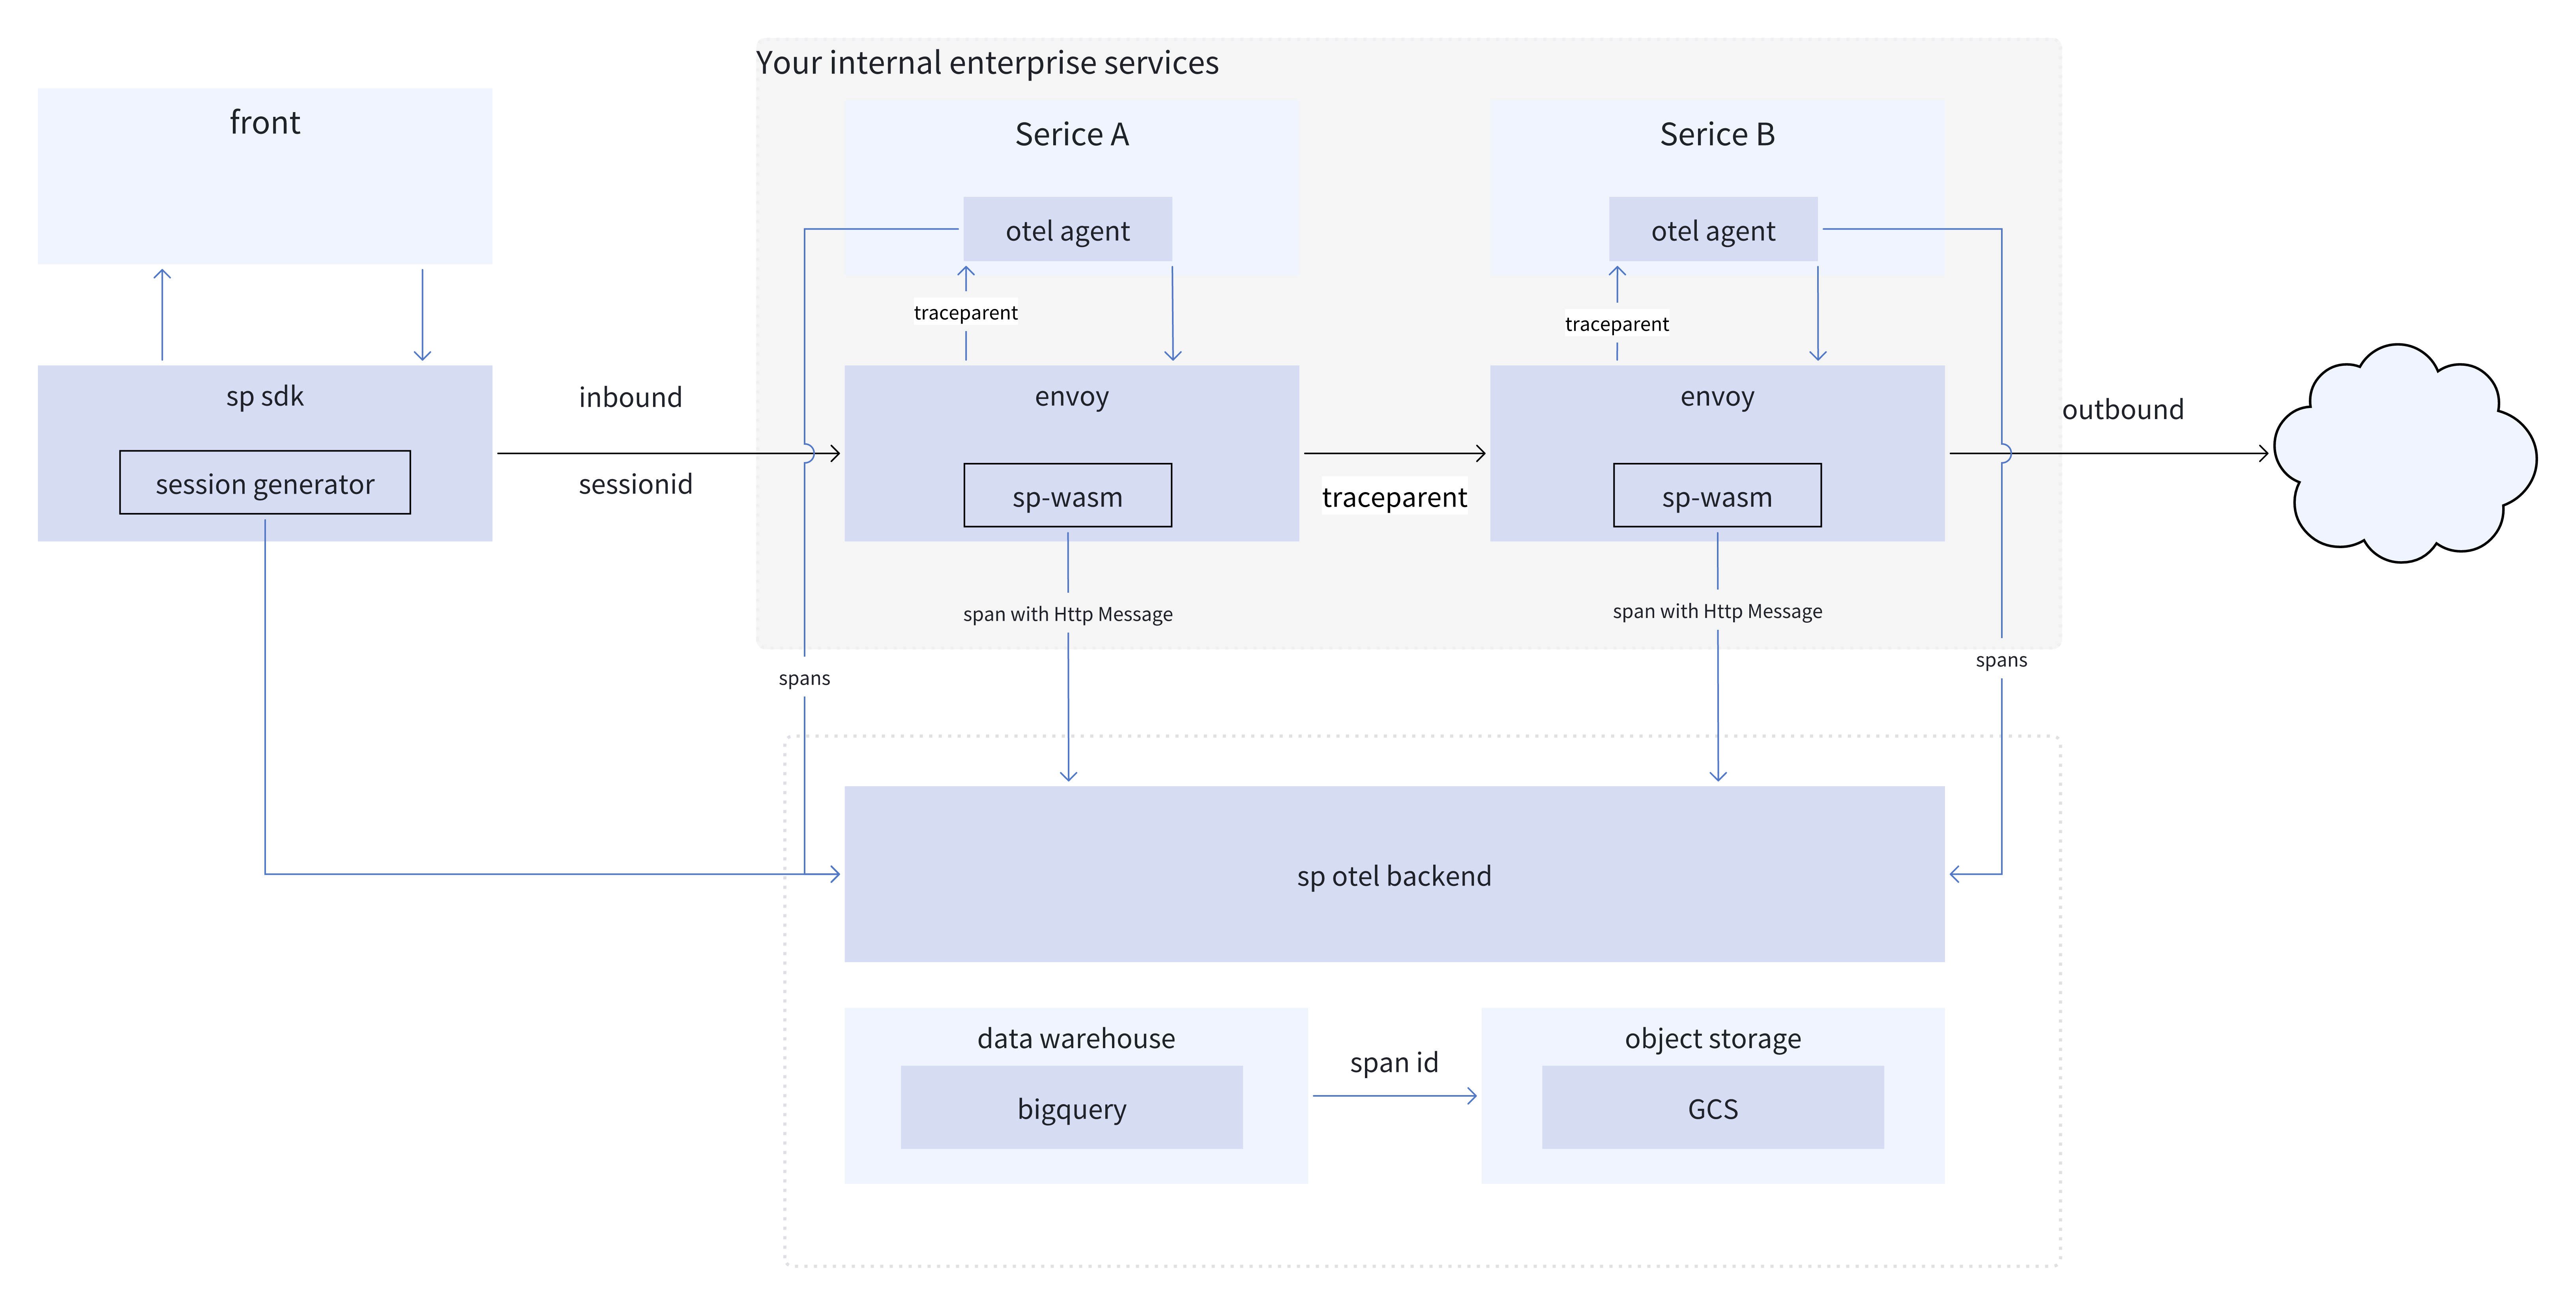
- Server-Side Collection: A lightweight Wasm plugin in Istio’s Envoy sidecar captures HTTP traffic and business flows, emitting native OpenTelemetry trace data GitHub
- Client-Side Enrichment: The SESSIFY creates sessions spanning multiple traces and adds route changes, performance metrics, and interaction events
Product roadmap
1. Context View
Visualize end-to-end user journeys as a session graph.
2. ETL
Export and transform session data for downstream analytics and long-term retention.
3. Troubleshooting
Guided workflows for root-cause diagnosis and resolution across services.
Currently available:
- Data collection: SESSIFY (session-level context) and Wasm plugin on Istio/Envoy producing native OpenTelemetry traces — SP‑Istio Agent is open‑source: github.com/softprobe/softprobe
- Visualization: Context View (session graph across services)

Current: Context View — session graph across services.
Compatibility & Isolation
- Native OTEL compatibility: If your application already uses OpenTelemetry, Softprobe does not interfere and will not modify your application’s OTEL data
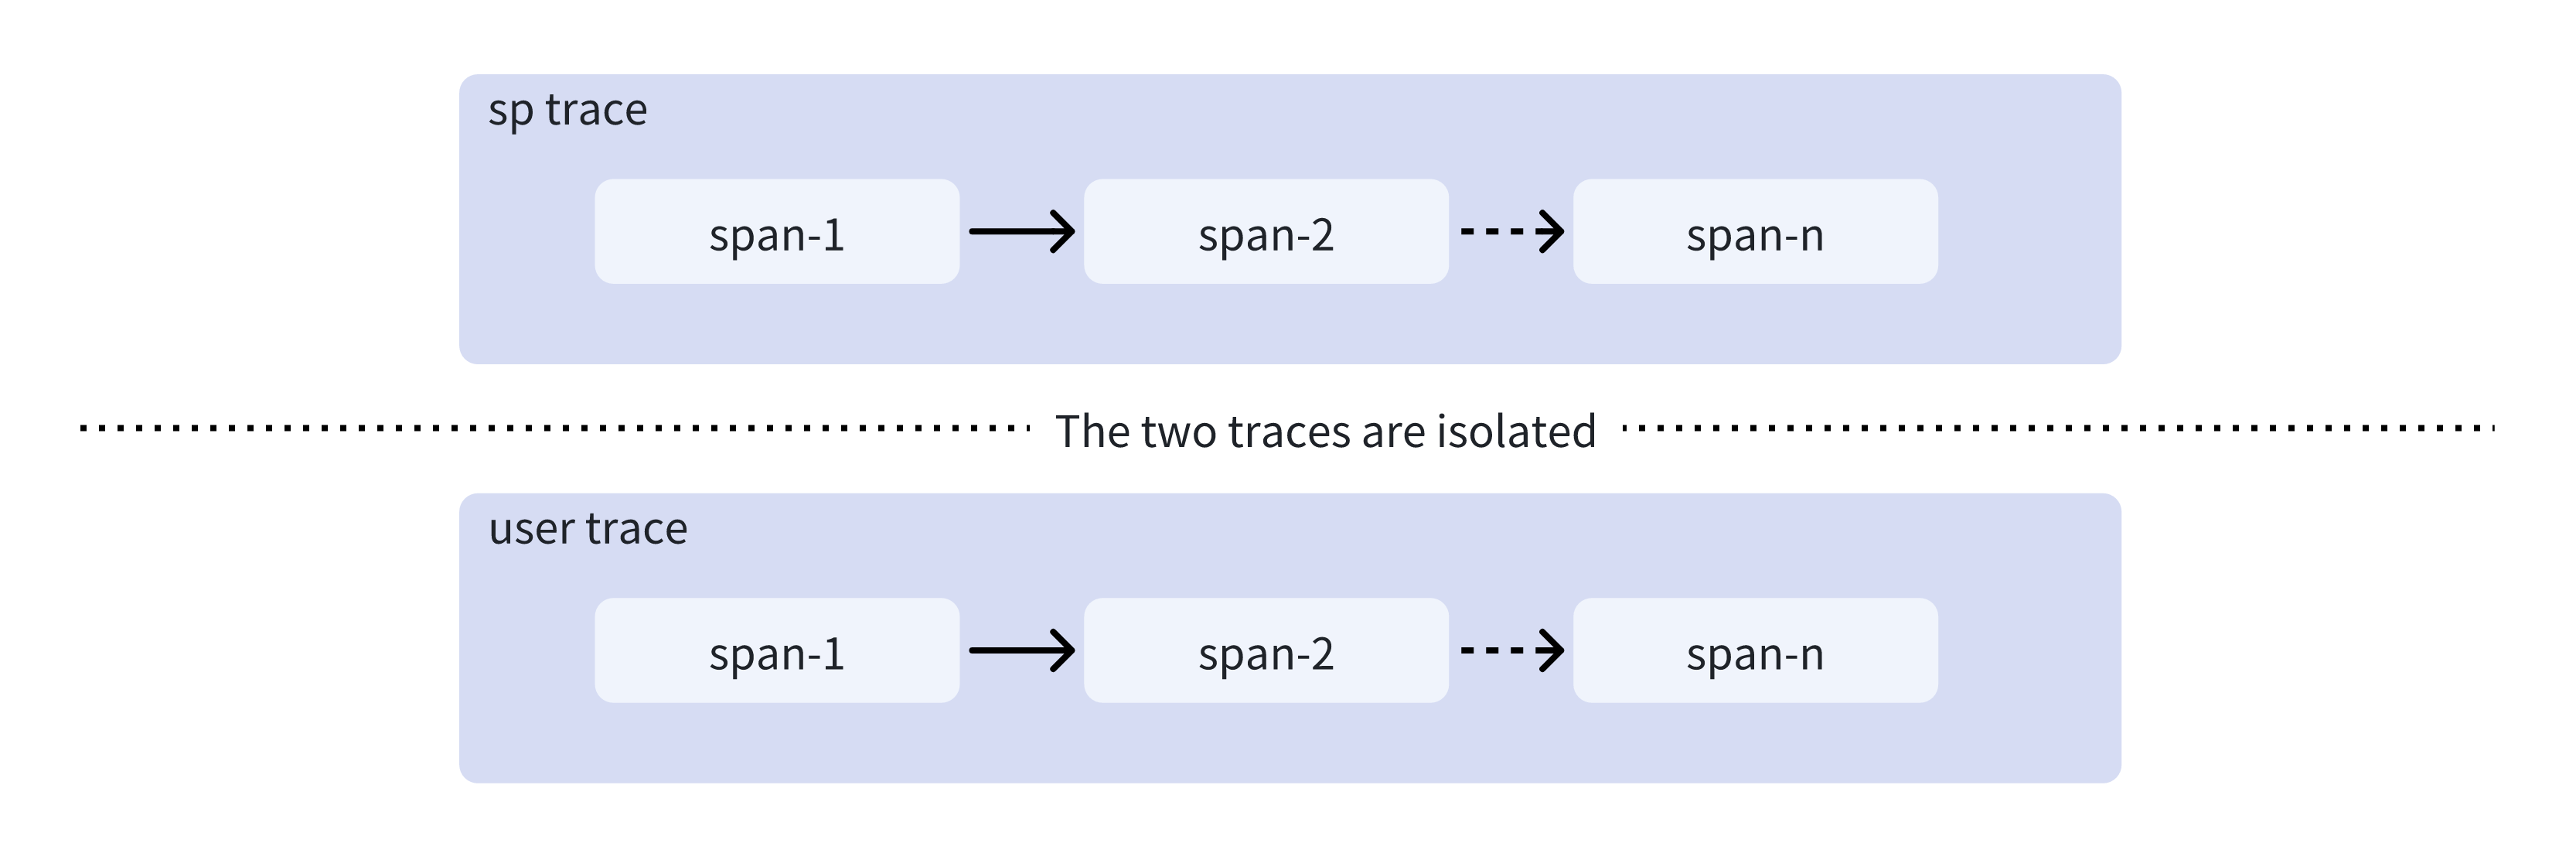
Softprobe traces and user traces are mutually isolated
Core Outcomes
Full-context visibility
Capture 100% of interaction details by session, eliminating blind spots caused by sampling.
Cost optimization
Retain full data while reducing overall observability cost.
Kubernetes-Native
Deep integration with Kubernetes/Istio for seamless production deployment.
Zero Code Changes
Go live without modifying server-side code.